Craft, Knitting

Knit: House of Cards Hat

IMG_0225

IMG_0153

EDIT 10/18/2020: It’s been 6 years since I posted this pattern, and to my shock people are still knitting this hat! To be honest I’d forgotten I’d shared it on Ravelry. Anyways, my original decreasing instructions were terrible and vague as far as how to stay in the pattern, so I’ve edited things to include the exact rows you need to do. Sorry everyone in the past who tried this hat! 😅

Friends may have heard that I wanted to start an Etsy shop. Basically, I took stock of my skills and what makes me happy, and I realized that this was it. I’m a crafter at heart. I like making lovely, ugly, crazy and colorful things. I can draw and create all sorts of little strange useless things, but the most “real world” thing that I could sell would be my knitting. I’m insecure of my drawings and doodles, but proud of my knitting.

So. I spent the winter holidays thinking of different things to make, small things that might actually be profitable. Because that’s really the problem with the whole idea of selling knitting. If you realistically take into account the cost of materials and labor, then you come to a fair price that no one is willing to pay. Most people have been blinded by fast fashion prices and clothes made of cheap materials, and could not fathom paying $50+ for a hat.

Anyways, I kept thinking about it. I knit little coffee cozies. I knit dishcloths. I knit cowls. I scoured Etsy endlessly, noting trends in materials and popular styles. A friend sent me that Wall Street Journal article about arm knitting, noting its “high ROI.” Just 30 minutes to make and they’re going for $50 on Etsy! Not to mention they are UUUUGGGGLYYYY. I tried arm knitting. It was terrible. I purchased a LOT of yarn, hoping to find a happy medium between price and quality. It was a bit overwhelming, although the hoarder in me was very happy to be buying lots of yarn again :).

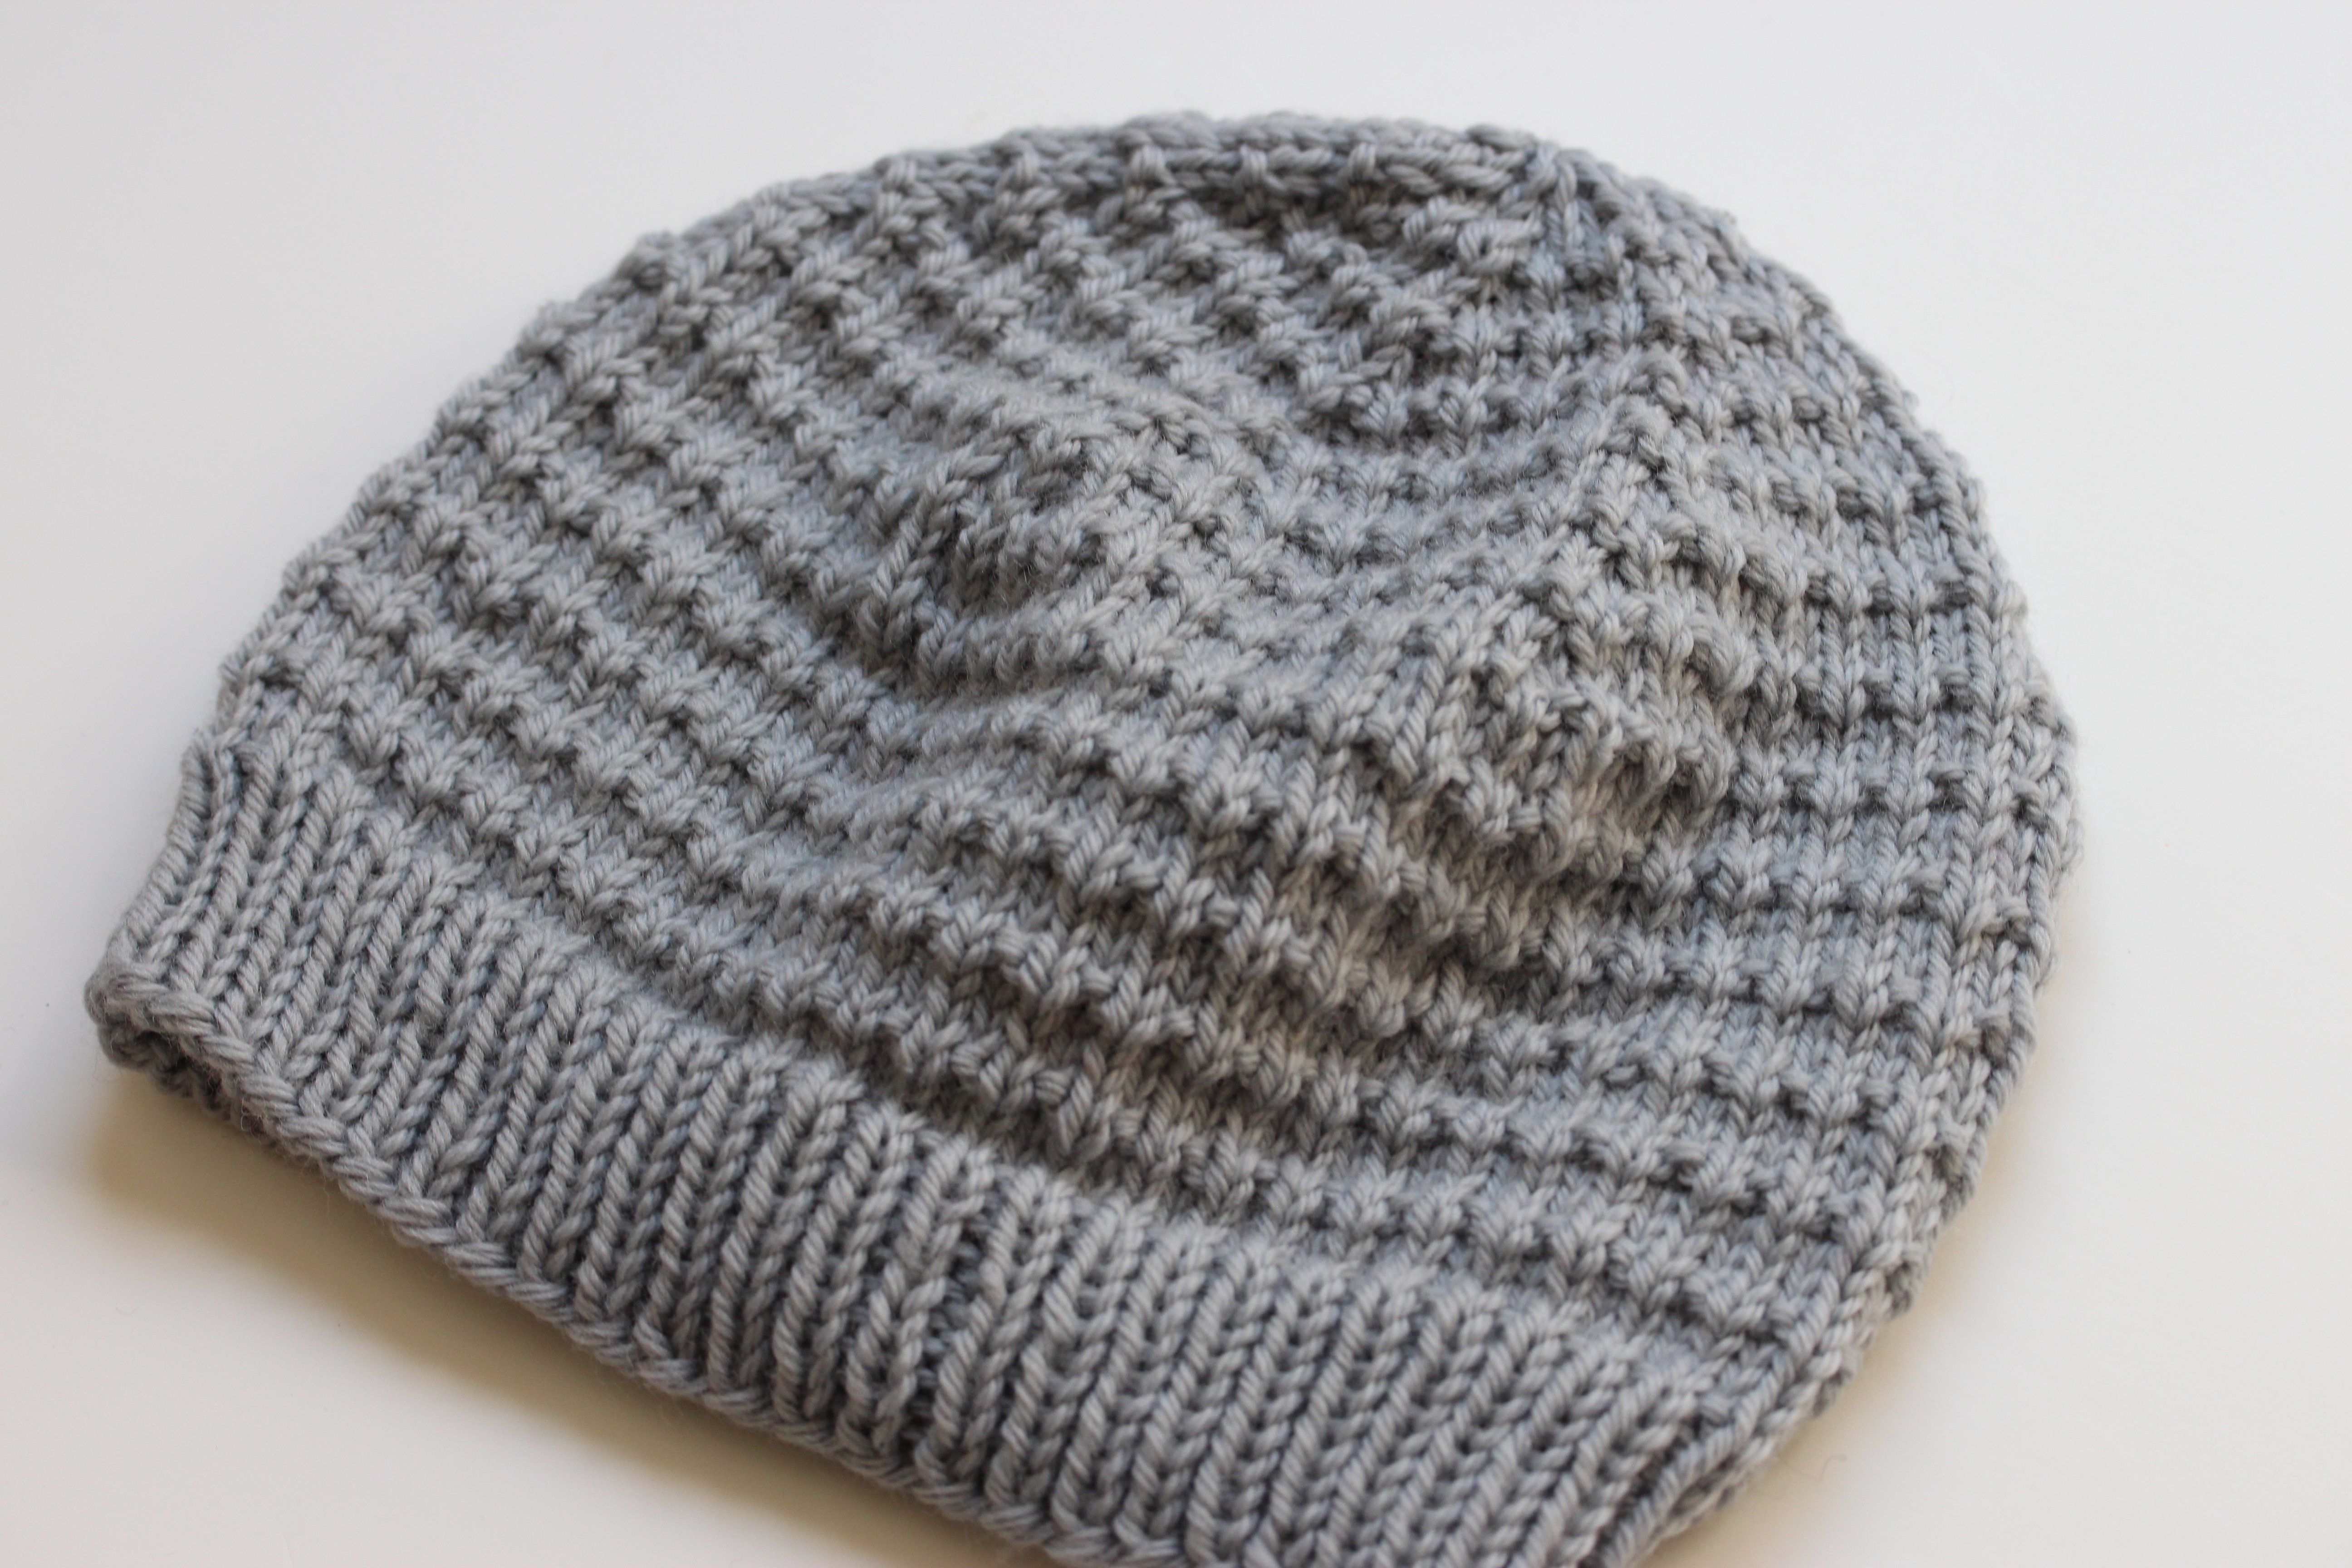
So my idea had been a bit stagnant for a month or so. Then, over the Presidential long weekend, I decided that I wanted a hat knit in Andalusian stitch. I’d knit at least three of the “Andalutheean knit dishcloth“, and I thought that the slightly nubby texture would be cute on a hat as well.

I cast on while watching season 2 of House of Cards, and after 3 false starts and stops (I was working without a measuring tape, URGH), I had my hat! I loved working with the yarn, but I never wear pink, so I put it up on Etsy. And now I have an Etsy shop . Well, that was simple. I’ve still got a ways to go as far as taking care of the little things, such as creating a proper banner for the shop and fleshing out logistics of shipping, etc. But! I think that this is a good reminder that sometimes we overthink things. Fuck ROI. Fuck market research! Sometimes you have a little fun making something silly and pink, and then you put it up on the internet.

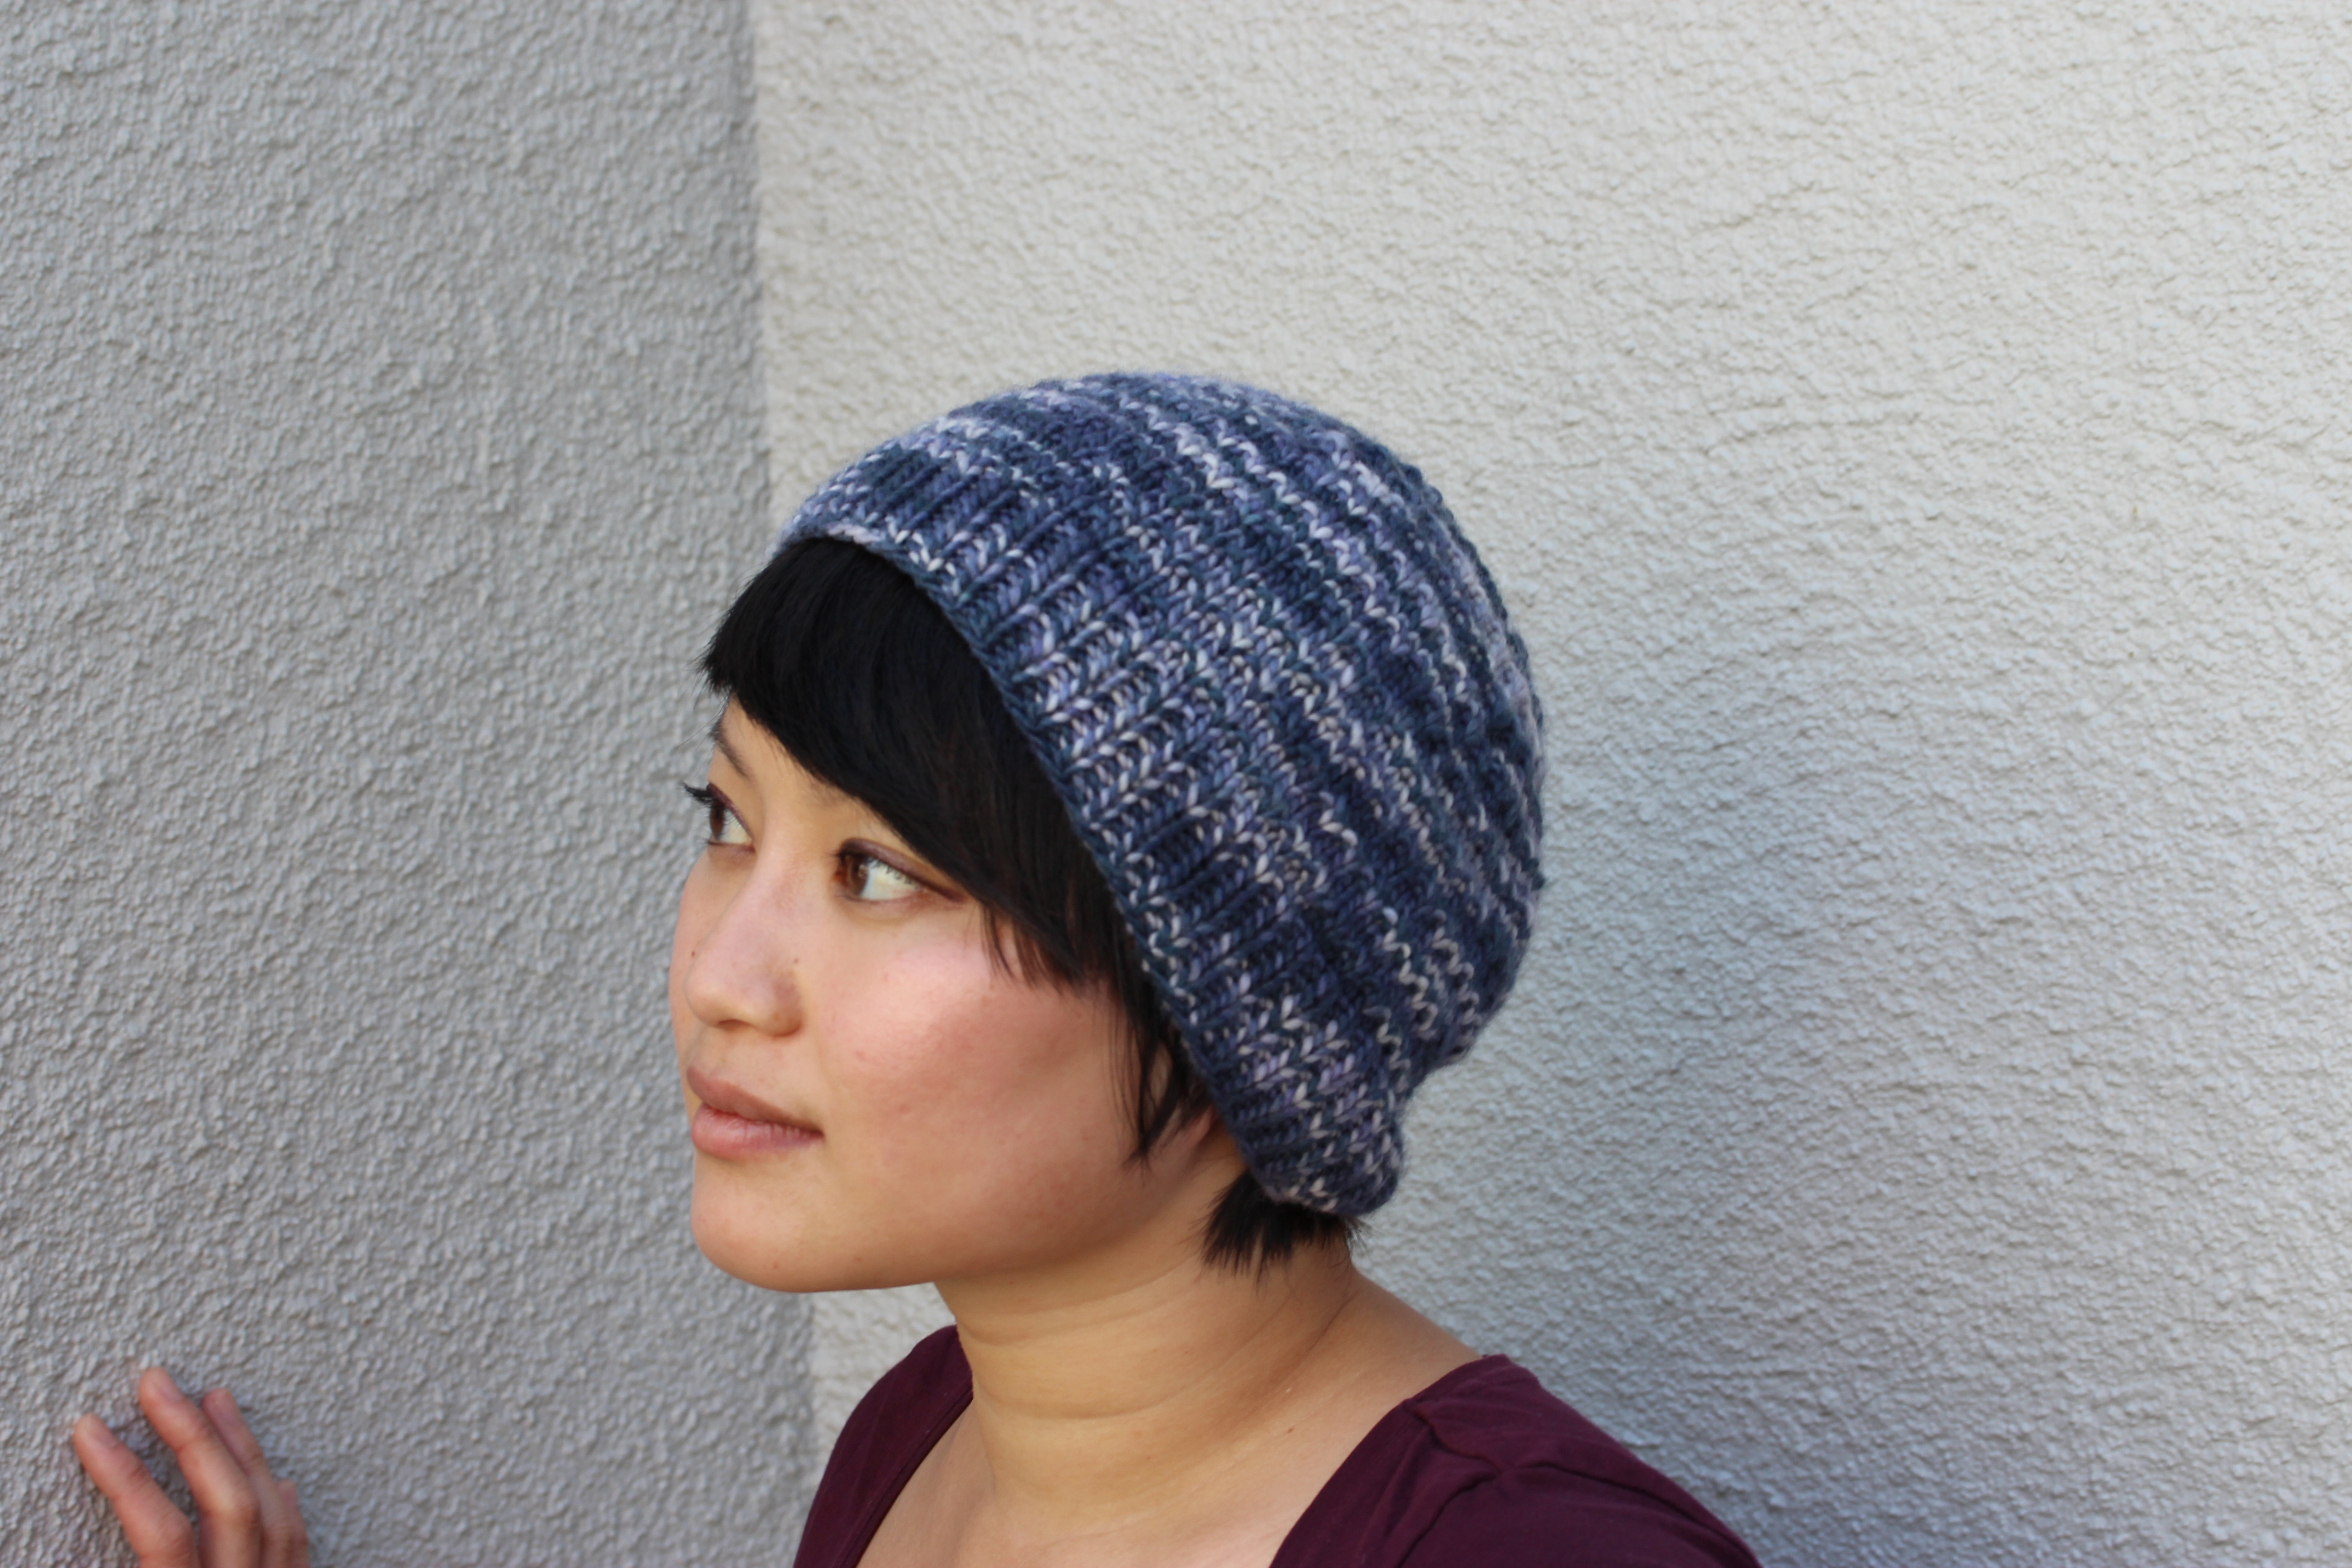
So, here’s my hat. If you knit it, please let me know! I’d love to see pictures.

HouseofCardsHat1IMG_0068

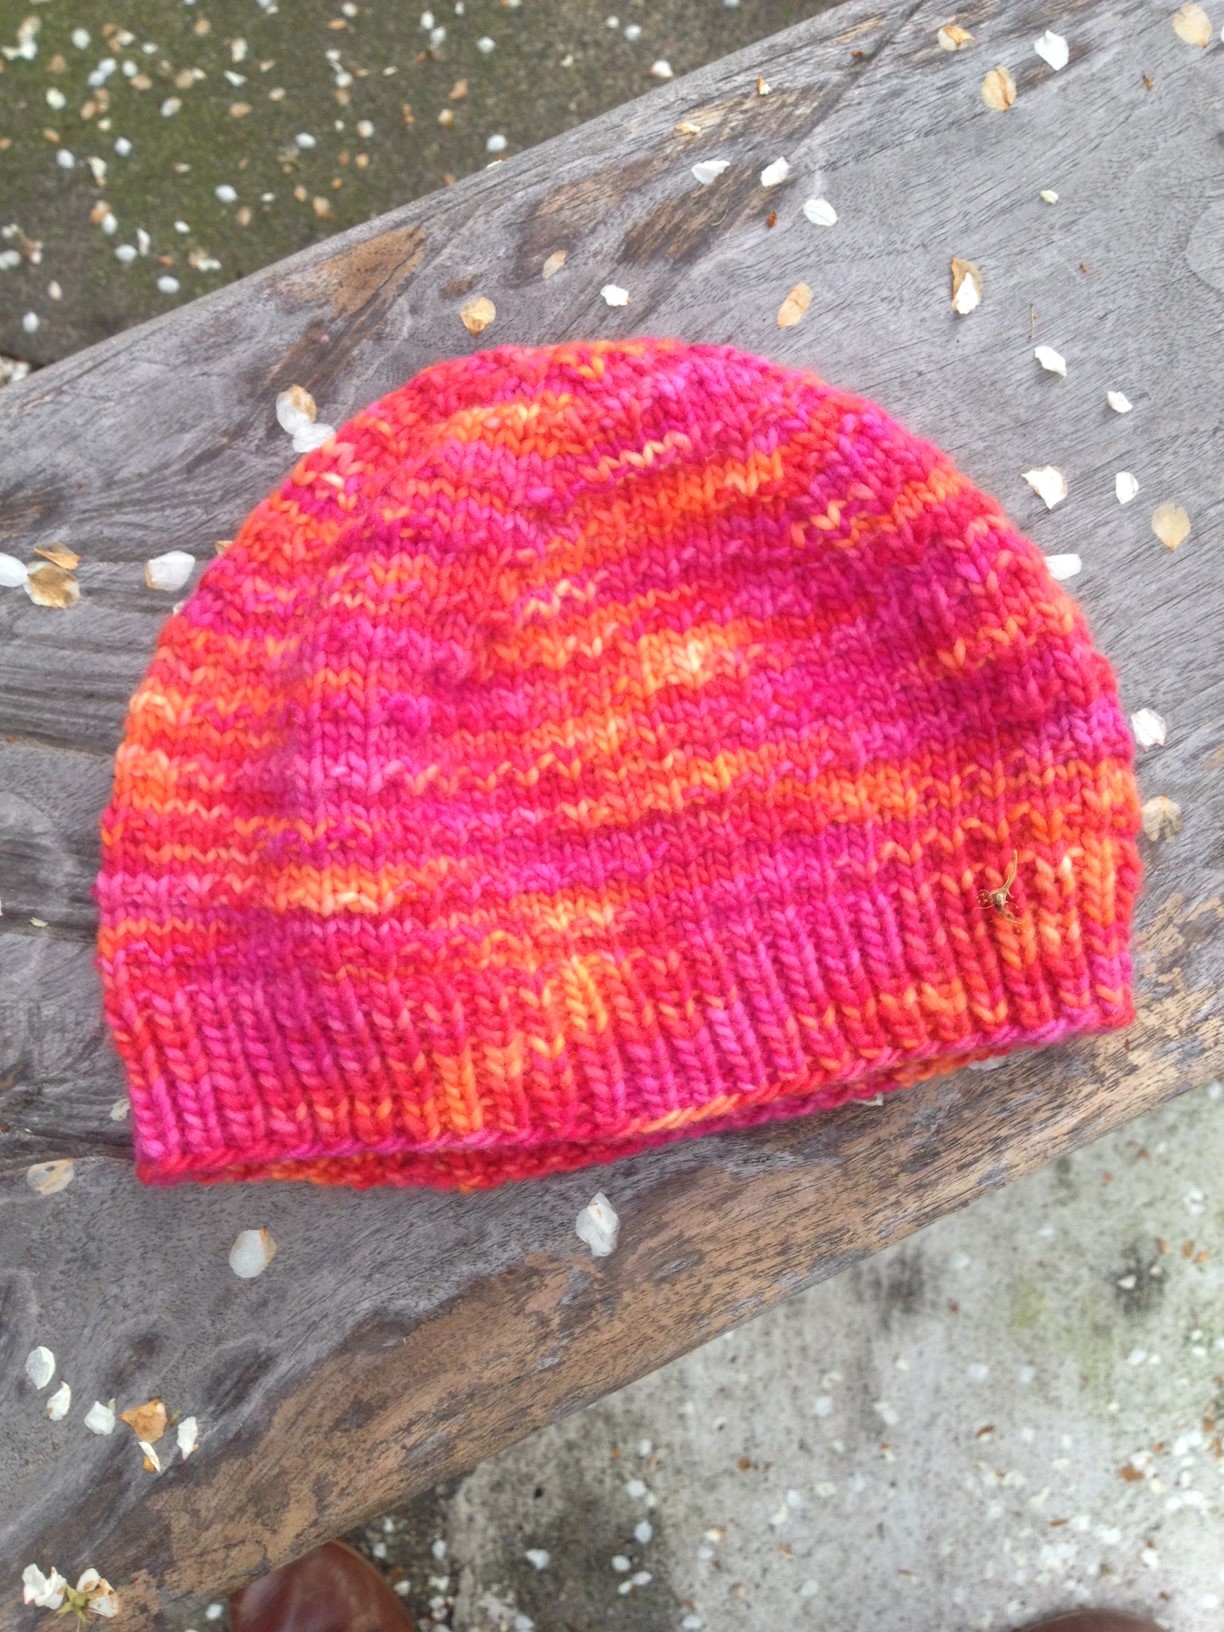
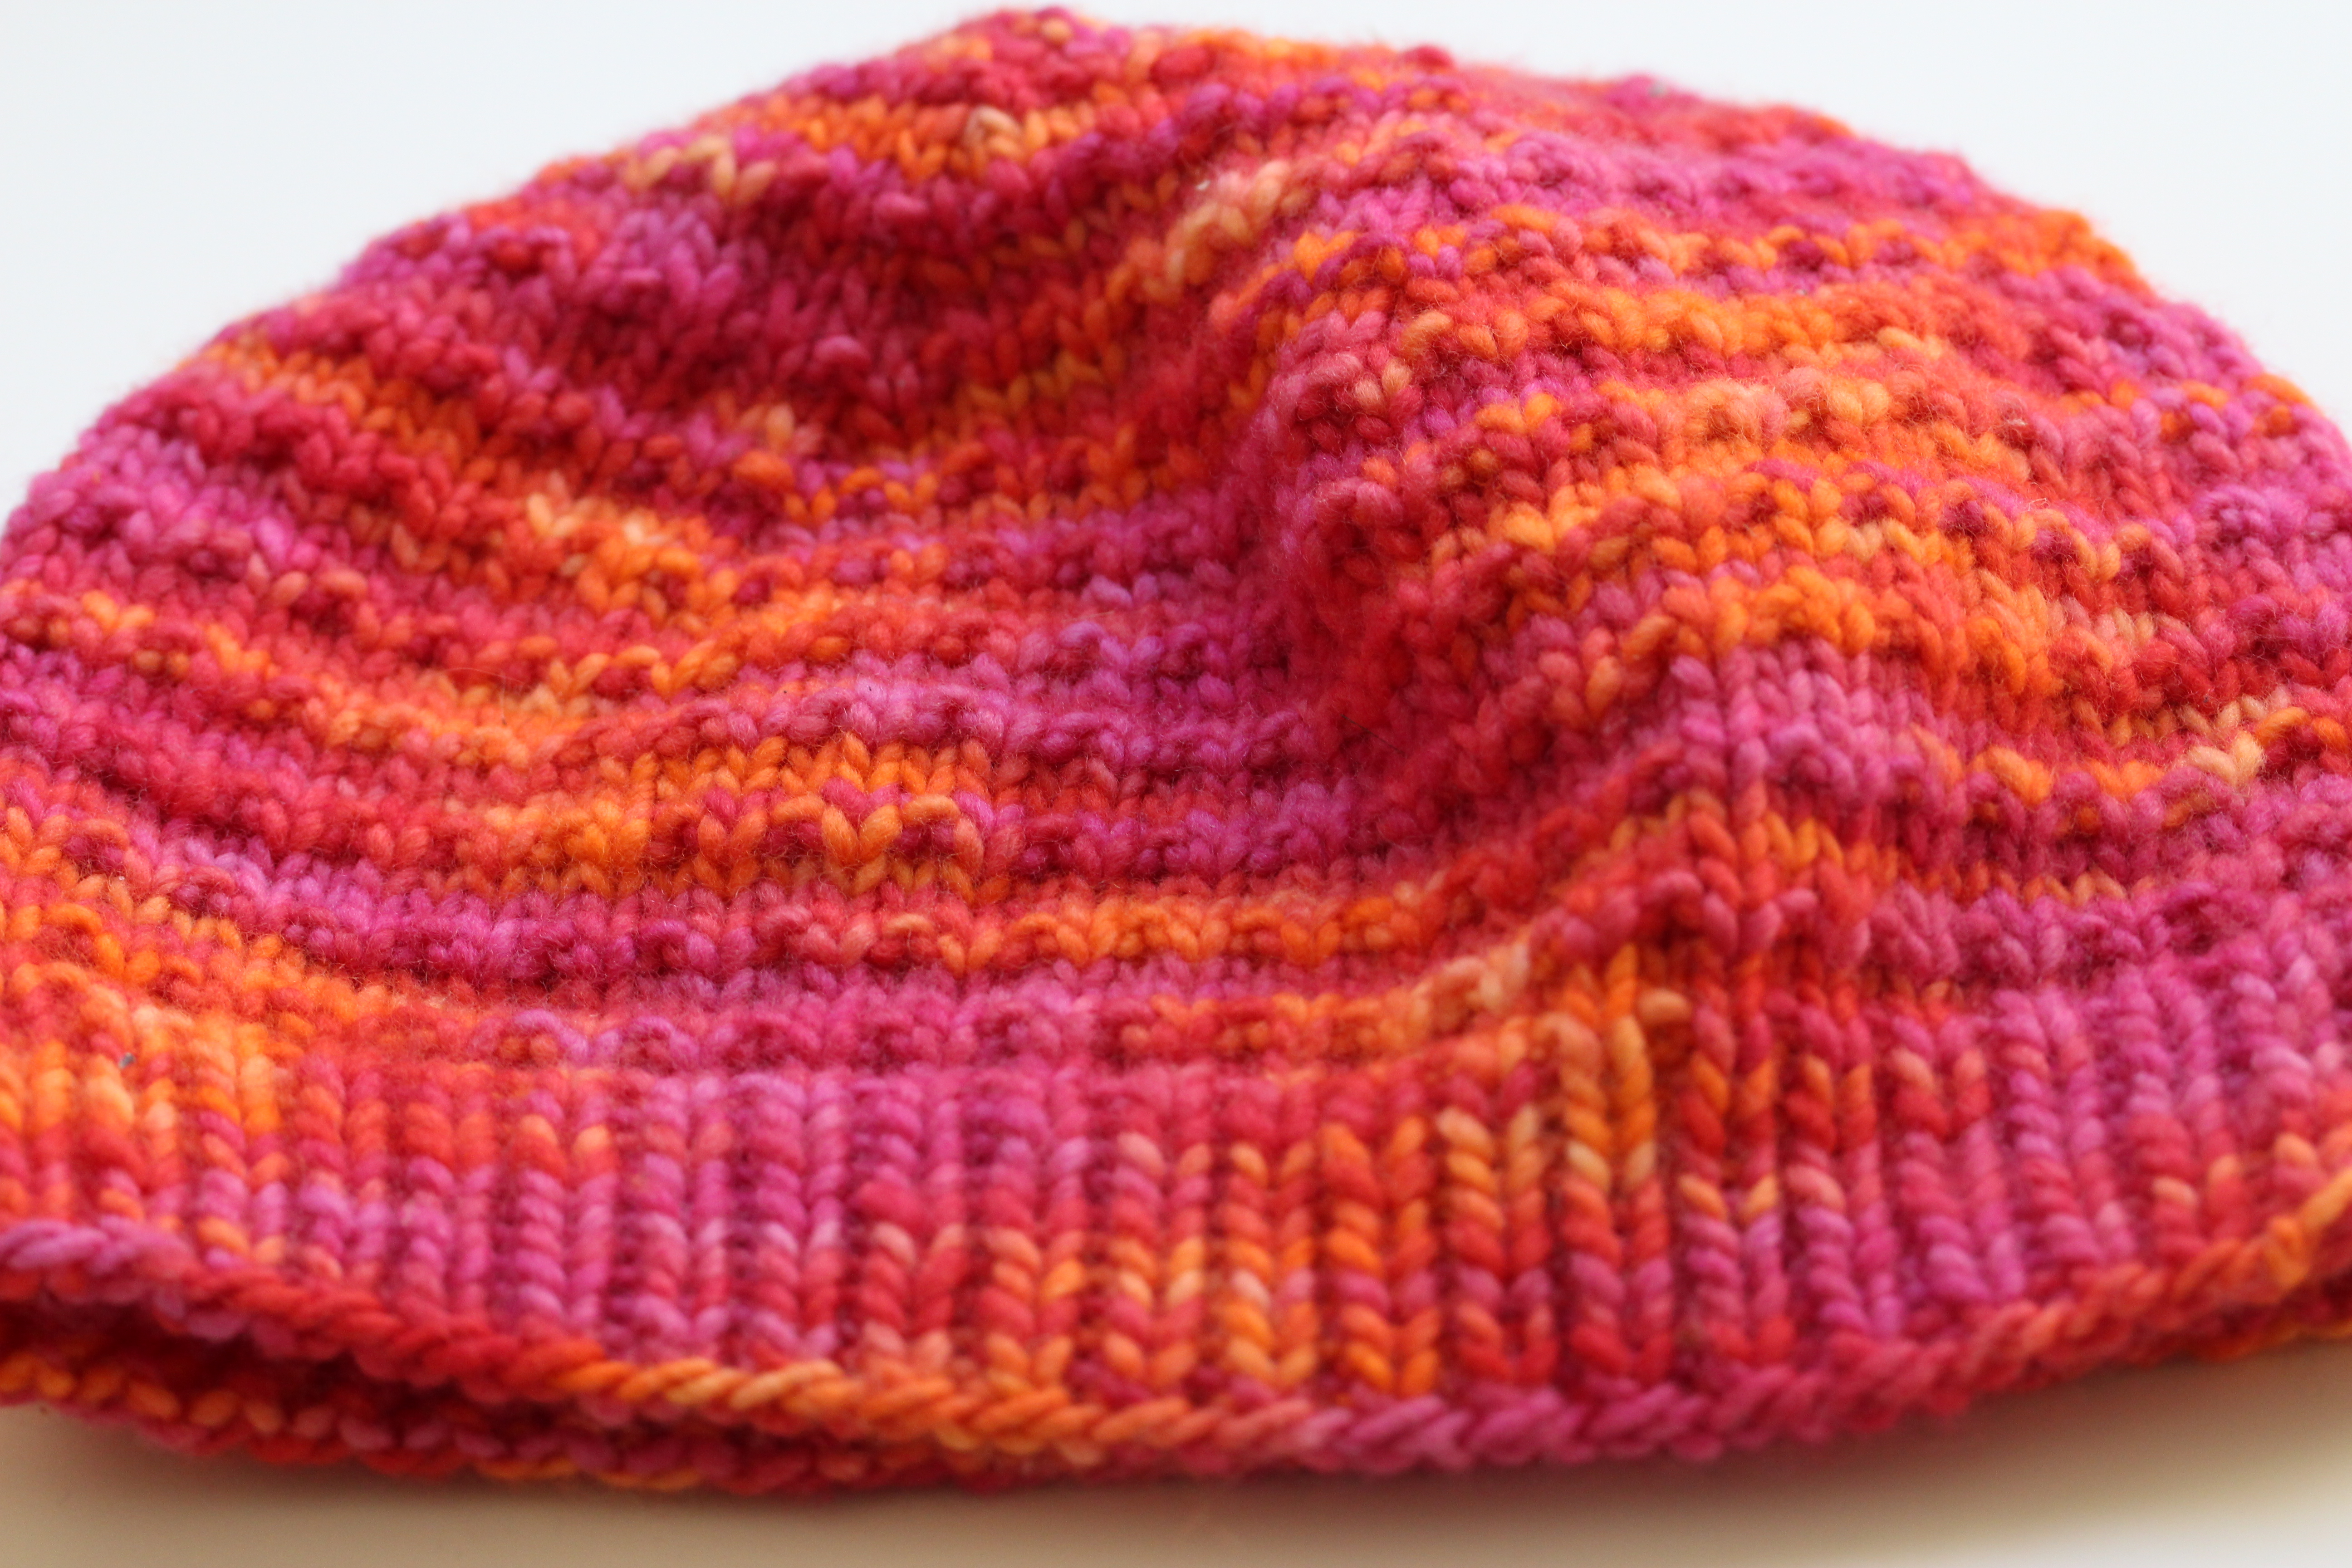
The House of Cards Hat

Andalusian Stitch (worked across a multiple of 2 stitches)

  • Row 1: Knit.
  • Row 2: Knit.
  • Row 3: *Knit 1, purl 1. Repeat from * across row.
  • Row 4: Knit.

Materials: Worsted weight yarn. Shown in Manos Del Uruguay Maxima in Peach Melba OR  Malabrigo Worsted in Alpine Pearl

Guage: 5 stitches/ inch across, and 8 rows/inch tall in Andalusian stitch

Dimensions: 9 and a half inches across, 7 and a half inches tall. Fits a 21 inch head, give or take an inch.

Needles: Size 6 circulars, Size 7 circulars, Size 7 double pointed needles

  • CO 103 stitches on size 6 circular needles. Join the round by knitting together the last and first stitches. You now have 102 stitches.
  • Knit in K1, P1 ribbing for an inch and a half (about 12 rows)
  • Switch to size 7 circular needles. Knit one row.
  • Start Andalusian stitch. Work for 5 repeats.
  • During the 6th repeat of the stitch pattern, you’re going to start decreasing on Row 4. You’re going to be doing the decreases in pattern, on rows 2 and 4 of the pattern.
  • Row 4: *K15, K2Tog* Repeat until end. Start with 102 stitches, end with 96.
  • Row 1: K across.
  • Row 2: *K14, K2Tog* Repeat until end. 96 -> 90
  • Row 3: *K1,P1* Repeat until end.
  • Row4: *K13,K2Tog* Repeat until end. 90 -> 84
  • Row 1: K across.
  • Row 2: *K12,K2tog* Repeat until end. 84 -> 78
  • Row 3: *K1,P1* Repeat until end.
  • Row4: *K13,K2Tog* Repeat until end. 78 -> 72

Continue in this vein until you get to the row where you’re doing *K4, K2tog* (should be Row 2). Here things start decreasing fast. Follow these last steps:

  •  *K4,K2tog* Repeat until end. 36 -> 30 stitches
  • *K1,P1* Repeat until end. 30 stitches
  • *K3,K2tog* Repeat until end. 30 -> 24 stitches
  • *K2,K2tog* Repeat until end. 24 -> 18 stitches
  • *K1,K2tog* Repeat until end. 18 -> 12 stitches
  • *K2tog* Repeat until end. 12 -> 6 stitches

String yarn through remaining 6 stitches. Pull tight, and weave in the ends. Hat time! I ended up knitting a purple hat as well. So girly. Sheesh.


HouseofCardsHat4


Craft, Home

Not Quite Block Printed Napkins

A little background

About a year ago I got into linoleum block printing. As a result of seeing my card posts, my friend Michelle from Hummingbird On High fame asked me if I could decorate a couple of napkins for her. After investigating the technique on Etsy, and seeing the block printed napkins post on Apartment Therapy, I agreed. I have worked with fabric before, but never in this particular way.

So Michelle asked me eons ago. Of course life got in the way, as it always does. By the time that I finally tried out fabric printing with linoleum blocks, I realized that for this project it didn’t make any sense. Using stencils would achieve acceptable results with much less work and a more even finish.

I stopped by the local art shop and picked up several different types of letter stencils in several different fonts and played around to find a look I liked. So I prepared! And YET when I finally sat down and pulled it all together, I still made several mistakes. Here’s a quick recap:

How to + Don’t Make the Same Mistakes I Did

Ah, napkin number one. So lemony yellow fresh, so full of promise. It’s going to have the word “EAT” decorated in the bottom right hand corner. I threw down a cardboard mailer to catch the ink.

Mistake #1: Remember to wash and dry your fabric first before decorating!

IMG_4198


Next I traced the outlines of the letters with pencil. I messed up, so I erased my mistakes. It became a mess that lasted until the end 🙁

Mistake #2: Do not trace and erase pencil on fabric. Use fabric chalk.

I traced over my pencil with the water-based black ink I’d purchased because I thought I was going to be filling it in with shading lines.

Mistake #3: Avoid freehanding if you can, the result is less polished.

IMG_4199


Ugh. You can see the erased pencil. So terrible. I ended up not liking the shading lines, so I filled in the letters completely black.

IMG_4200


For the next napkin I got it together a little better. I taped down my stencils.

IMG_4201


And carefully filled in the outline with a very very thin coat of the ink (different effect than the first time around). Then I let it dry for about 10 minutes. Then I added another layer.

IMG_4202


It’s all good, right? NOOOOOO.

Mistake #4: I did not put my ink protection between the napkin layers. The ink bled through. D’oh.

IMG_4203


Next I removed the stencils and manually added the serifs to the letters. This is about what it looked like when I was done. I added another thin layer of paint to fill out the empty white spots after this picture was taken. The napkins air dried for about 24 hours. The finishing touches were a quick ironing to set the ink, hand washing in cold water, air dry (again), followed by another bout with the iron to press the napkins.

IMG_4205


Phew! What work just to decorate some napkins! Seriously though if you want to decorate fabric you should have at it. The main tips again:

  1. Practice on a rag first
  2. Wash and dry your fabric before printing/decorating. It may shrink.
  3. Lay down something in between layers so the ink does not bleed through. A piece of cardboard works well. Avoid newspaper.
  4. Use fabric chalk to sketch out your ideas.
  5. Don’t go freehand if you don’t have to. Best to print out a stencil and tape it down for stability.
  6. Use water-soluble screen printing ink. I used Simply Green, which had a precise nozzle tip for detail work.
  7. Use very thin layers of ink. If you get too gung ho about it, it’ll be all puffy, and that is gross, especially when you iron it out.
  8. If it looks like crap when you’re done decorating, don’t worry. It will probably even out after you iron, wash/dry and iron again.

Happy crafting!

Craft, Home

Turn On The Lights

Well, the “throw some holiday lights in a mason jar” thing finally made it to Real Simple. Saw it while I was scanning this month’s RS in the bath and almost dropped the magazine in the water. Really, Real Simple? It took ya this long? Did one of your writers finally see it on Pinterest or something?

I decided not to be outdone by Real Simple. After my bath I marched into the kitchen, dumped all the quinoa out of the prettiest jar in the pantry, and stuffed in some blue and white LED snowflake lights that we had lying about. I’m undecided about the outcome, but glad that I got it out of my system.

A few things that came to mind after I was done (AKA five minutes later):

  • You actually need a pretty big jar with a wide mouth to stuff all those lights in there. Like not “drinking a trendy cocktail out of a mason jar-sized mason jar” but “this is going to be full of beans and heavy as hell when I lug it back from the co-op -sized mason jar.” This makes sense, but I had not thought of scale when I saw the project on others’ blogs.
  • White cords with white lights are key. Green cords look a bit messy to me in broad daylight. I suppose it comes down to taste.
  • Lights that are battery charged make the most sense for stuffing in there, but if you use wall plug in lights, just cut a hole in the top of the lid. If you’re using a Ball mason jar, you can remove the top circular part of the lid for the same look.
  • Safety is key. I’m paranoid about the heat of the lights melting the whole shebang, causing a fire or exploding the jar, leaving me permanently blinded (even though I think Mythbusters proved that was not quite possible) so I think LED lights are the way to go. Or you could just use them because they save energy.

They’re cute I guess.

Art, Craft

Linoleum Block Printing- Part 3

My friends decided to do a craft night at my house- my knitting is pretty much dead right now, so I chose to work on my block printing. We had a nice spread of munchies to keep us fortified- red cabbage, miso dip, cheese, meat, bread and soup.

So I’d agreed to help my friend Michelle  make some printed napkins. After a bit of research I’d heard that screenprinting ink was the way to go with block printing on fabrics. Oh lord. IT WAS NOT PRETTY.

I put some ink in my tray, and the brayer (rolley thing) wouldn’t move! Even worse, once I got the ink on the block, it crept into all of the crevices of my linoleum block. It just wasn’t tacky enough. What a waste of time. Since I’d already bought so much ink, I decided that the only way to use this stuff would be to make some stencils. I dug the packaging of my March Birchbox out of the recycling, and cut up a simple “EAT” out of the cardboard. Then I tried printing it with the brayer onto a random pair of boxer shorts that came from my house’s “bicycle rags” pile. ALSO- not pretty. The transfer was so-so. So I think the moral of the story is don’t use a plastic brayer for fabric ink. With a fluffy brayer you might get a decent effect.

Feeling desperate, I raided my makeup case. I found a Bare Minerals Baby Buki brush, took a deep breath, and proceeded to slather the brush in the ink. The results were okay but didn’t merit a photo, even though the image of “EAT EAT EAT” all over a pair of boxers was pretty funny.

I think my next course of attack will be to try a proper paintbrush with my stencil, or a brayer from a paintshop.

Oh well. Since that was a bust, I moved on to finishing my latest linoleum cut.

I finished up my cat print. I really like how it turned out. I cut this print on unmounted linoleum, and the process and the printing were very different than with my first print (on a mounted block). Basically, the unmounted linoleum I purchased (Speedball) was a little bit softer, thus easier to carve  and good for prints like this with lots of negative space.

The unmounted linoleum was also cheaper, and takes up much less physical space in your home than the blocks.

There were a few major disadvantages to this format. The linoleum would scrunch up sometimes if you were too aggressive with your carving. Also, printing was harder with the unmounted lino. Since it’s not as deep you are more likely to have mistakes with your printing (edges of the paper touching the messy workspace, etc). The softer linoleum seemed to shake out in little clumps and sabotage my printing. Also, when you wash off your ink, the unmounted linoleum really seems to suck up water and warp. I wouldn’t want to do anything really intricate on this stuff. It doesn’t feel like it will last.

I liked the golden yellow ink that I was using so much that I printed out a few copies of “Diving for love.” The lighting is a bit dark because I didn’t want to kill the mood of craft night, but geez this goldenrod is so beautiful. Just trust me.

All in all the night was a success. Everyone made progress on their projects. Now I wonder what to print next? I may move on to working with rubber. I’d like to make a stamp for my etsy shop, if I can ever think of a name for it. 🙂

Art, Craft

Linoleum Block Printing- Pt. 2

I am so bad at following up on craft posts, but this time I actually finished a project :). It helped that I had Jillian to coach me through the process. My cards turned out well and I ended up passing them out on Valentine’s Day.

Carving

When we last left my linocut, I’d drawn my print and transferred the image over to my linoleum block, with the help of my trusty spoon. Then came the fun part: carving out the negative space! Here it is in progress:

Printing

The ink that came with my kit is water-based, which meant easy cleanup. Surprisingly, the ink felt tacky and took a bit of work to smooth out.

Here’s an inked up block. Also very tricky: applying just the right amount. When you apply the right amount of ink to the tray and to the block, you get just the faintest wet gleam.

For printing, there are specialty tools, but I went back to my trusty spoon!

Results:

This is what happens when you use too little ink. If you happen to use too much ink all the crevices fill up and you won’t be able to see anything.

Here’s a print that’s more successful.

When I finally got my method down, things went like gangbusters! Here are my cards drying on my kitchen table.

For my next linoleum block I wanted to do text, but honestly I got bored with carving out so much blank space that I scrapped it.

Possible next linoleum block subjects:

  • Bismarck
  • Cup of tea
  • Sea creature
  • A state
  • Business cards