Rails + Angular Project: Hangry!

Here we go! This is my last assessment for Learn Verified. To finish off the AngularJS section, we were tasked with creating a single page app, with an Angular front-end, and a Rails back-end.

Specific Requirements Included:

Angular

  1. Must use an Angular Front-End that includes at least 5 pages
  2. Must contain some sort of nested views
  3. Must contain some sort of searching as well as filtering based on some criteria. Ex: All items in the “fruit” category, or all tasks past due
  4. Must contain at least one page that allows for dynamic updating of a single field of a resource. Ex: Allow changing of quantity in a shopping cart
  5. Links should work correctly. Ex: Clicking on a product in a list, should take you to the show page for that product
  6. Data should be validated in Angular before submission
  7. Must talk to the Rails backend using $http and Services.

Rails

  1. Backend created with JSON that accepts and stores the data for Angular

Project

Based on my experience with past assessment projects, I knew that I shouldn’t go too fancy. Get the project working to hit the minimum requirements, THEN have fun with it. Since the last several projects I’ve done were variations of CRUD apps (CRUD in Sinatra, CRUD in Rails), I decided to do another CRUD app, this time to see the way Angular likes to do things. I also knew that I wanted to work with the Yelp API.

So my app allows you to CRUD restaurants (well CRU for now, I didn’t care to add Delete as it seems like something you’d only want an admin to do, and I don’t have roles added yet…). New restaurant information is validated using Angular form validation. Restaurants on the restaurants index page are populated to the page with ng-repeat, and you can filter your results by searching by name or city with the filter directive. You can also search the OpenTable API for restaurant suggestions (ng-resource). On the home page the search results are nested, using UI-Router.

Code on GitHub Here

Here’s the walkthrough. I forgot to show the form validations, but they are there!

Issues & Notes About This Project / AngularJS / My Program

So, I mentioned in my last assessment that my program’s curriculum seemed a bit lighter on the JavaScript and jQuery sections. Unfortunately, it only got worse with AngularJS. This was easily the weakest section of the whole program, and unfortunately it was at the very end, when my patience was at its lowest. I felt like I was adrift at sea during the Angular section, and the dearth of lectures for Angular was frustrating.

One of the best parts of the LV curriculum is how each topic seemed to build logically on top of the previous topic. It really helped with comprehension. The Angular section on the other hand…. the lessons were like “HEY! Look at this cool shit Angular can do! SO COOOOL.”  And then the next lesson would be “Hey look at this other random thing Angular can do. HA ha!hAAA Angular is so cray you guyz.” The underlying framework of how everything fit together just didn’t really feel like it was there. Even more annoying was the fact that the lessons actually said things like, “See isn’t that easy? Angular is so simple!”

NO. No it’s not easy. This is exploding my mind. SHUT UP.

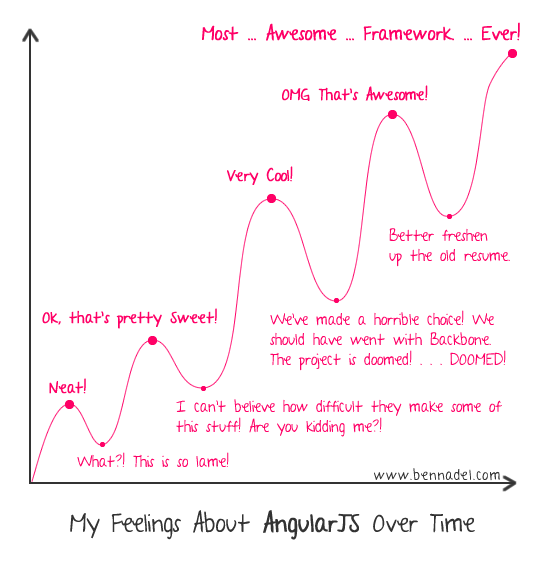
Honestly, this cartoon really captures the emotional rollercoaster of AngularJS well.

angularjs

Anyways, thank the coding deities that I listened to my classmates and chose to buy Tony Alicea’s very popular Learn and Understand AngularJS Udemy course. It almost didn’t happen, because I’m cheap, but yeah, I really was that desperate. I even bought it with a Udemy coupon that was ONLY 40% off. Whatever happened to those 99% coupons? I miss those.

The Udemy course helped a lot, however you know, it still took a while for my mind to really get it. Checking out as many resources as possible is what helped me piece things together.

ANYWAYS, this is all to set up my mindset at the time of starting this project. I should also mention that I was starting to get stressed about money, and really needed to finish things up. So I was frustrated and broke. Okay, a little overdramatic, but you get the idea.

Technical Issues

It took me a while to figure out how to rig up Angular to work with Rails. I looked at a variety of sources, and this tutorial was rather helpful.

Conceptually I got how things were connected, but while creating this app I kept tripping myself up with the naming of my controllers. They were too similar, and I made a blunder in my code referencing the incorrect controller. This single mistake cost me an entire day to ferret out.

Another major pain point was working with Yelp. Yelp is my go-to site for planning all of my meals out, and their API looked promising. Alas, it was a pain in the butt. I spent a good 2-3 days trying to make Yelp work, even looking into their gem. Then I stumbled upon a thread from 2012 where people were complaining about Yelp removing its API documentation for JavaScript. Uh… like 4 years later and it’s still nonexistent. I took that as a sign that I should move on. Angular was going to be hard enough, I didn’t need to stall on an API. Thankfully I found the Unofficial OpenTable API. It didn’t have the richness of data that Yelp offered, but it is simple to query and requires no API keys. Hallelujah!

My last major hurdle was getting Bootstrap to work with AngularJS (it gets funky because of jQuery). I ended up just using the CSS, and that worked fine.

Next Steps

I’d like to integrate Google Maps into the Restaurants show page, and it would be great to get that Yelp API hooked up as well.

This is my last project and assessment for my program, so it’s time to start job hunting!I’m going to try to keep the momentum going on my learning, though. I’m going to be working through the algorithm and project sections of Free Code Camp, Harvard’s Intro to Computer Science course CS50 , and Mackenzie Child’s design and Rails courses. If you know of any back end junior dev  jobs, let me know!

How to Write a Better Git Commit

Code reviews and assessments are two of the most useful parts of the Learn Verified program. A key thing that I learned during my Rails Assessment a few weeks ago is that potential future employers are going to be critically looking at your GitHub commit history. Well I knew that people would check out my GitHub of course, but it helped to know what others are looking for.

Now there are quite a few different schools of thought about how to write the best (aka most useful to other people checking out your code and your future self as well) commit message, but I’ll try to summarize what I’ve learned via assessment conversations and comparing notes.

One thing that I heard that surprised me is that employers will look at your commits and actually compare your changes with the description. Do they match? Or are there other things in there that you forgot to mention? Are the commits regular? I will admit that in the past I was not great about this. In the past I was committing willy-nilly. At certain points I would be like “Oh I haven’t committed in a while, better take care of that”, and then I would try to remember what I’d done since my last commit. Bad idea!

DOs

  • Commit early and often. Perhaps every 5 – 10 minutes. Something is worth committing when you’ve been really typing for a bit.
  • Consider making your commits feature-based. So for example:
  • Set up User authentication with Devise
  • Move jquery and bootstrap from script tags in layout erb to gems in asset pipeline; fix the issue of nav button dropdowns not working after creating a new attraction by adding document.ready(toggle) to js
  • I haven’t tried this yet, but have a subject line and a body, leaving a line in between for readability.  Capitalize your subject line, which is really a short summary of the change (50 characters or less). Use the body for explanation. Blank lines between paragraphs. Thoughtbot suggests ditching the -m flag altogether, to get yourself in the right state of mind.
  • Probably most important: Explain why the change was made, how it addresses the issue, any design decisions, and any foreseeable side effects the change will have.
  • I suppose this is a syntax and style thing, but it seems like most people prefer the imperative tense as it implies a command and matches Git’s tense. So, “Fix” or “Change” instead of “Fixed” or “Changed” for example.
  • Wrap your commit messages to 72 columns to prevent overflow. This is another thing I haven’t tried yet.
  • Say you thought you had fixed an issue during a certain commit. Say you realize that no, this time you’re really fixing that feature. Instead of committing “Fixed Feature X for real this time”, you can go back and amend your previous commit. Check out git commit –amend.

Phew! That was a lot, but if you think about it, it’s mostly common sense.

10 Fun APIs to Inspire Your Next Project

I’m currently working on my final project for Learn Verified- a single page app with an AngularJS front-end and a Rails back-end. Like I’ve said before, coming up with a project idea is often one of the biggest hurdles of these assessments. For my current project I found myself browsing APIs and hoping to be inspired. Here are ten fun APIs I came across… maybe you’ll find one to use for your next project! 🙂

  1. 1. San Francisco OpenData – OpenData is a treasure trove of information. My favorite data set details Film locations in San Francisco.
  2. 2. NASA API I’m not sure exactly what NASA offers, but hey, it’s NASA!
  3. 3. We the People API – The White House has a petitions API! They’ve also laid out API Standards for government created APIs. A little more info: Using our API, you can bring We the People petitions to third-party platforms (including other petition services, personal blogs, and websites) in order to spread the word and help gather even more signatures. Any signatures collected this way, once validated, will count towards the signature threshold needed for a petition to receive an official White House response. Think of our API as a valuable tool for building community support around an initiative — it can help get a petition in front of more eyes, more quickly, with exciting results. 
  1. 4. Pokemon API – Finally; all the Pokémon data you’ll ever need, in one place,
    and easily accessible through a modern RESTful API. Gotta catch ’em all!
  2. 5. Marvel Comics API – The Marvel Comics API allows developers everywhere to access information about Marvel’s vast library of comics—from what’s coming up, to 70 years ago. Search 70+ years of comics by character, series, creator… OMG
  3. 6. Yoda Speak API –Turn your sentences and webpage into Yoda-speak. This one is pretty silly, I’ll admit.
  4. 7. The Cat API – Cat pictures!
  5. 8. Audiosear.ch API –Search for words and keyword tags in a full-text index of top podcast and radio shows. Get web profiles for podcasts, and find audio about trending topics, and audio recommended by influencers like Ira Glass. 
  6. 9. BreweryDB API  – Beer beer beer!
  7. 10. National Nutrition Database API – Our API provides REST access to the National Nutrient Database for Standard Reference (NDB) . It is intended primarily to assist application developers wishing to incorporate nutrient data into their applications or websites. That sounds awfully dry, but I think it could be super useful. Bookmarked! 

If none of these APIs excite you, you can search Programmable Web’s API directory by category & protocol. Want a little handholding? Codecademy walks you through working with several popular APIs(Twitter, YouTube, SoundCloud, etc.)

jQuery Project: Vacay+

I’m at the point in my program where all I’ve got left are projects and the corresponding assessments. Awesome and terrible. Awesome because projects are where the learning really happens, and where I tend to get into a flow. Terrible because project time is usually when my ego takes a hit. My track record for amount of time spent on projects has been all over the place. Would it take me a day or two to finish this project (Sinatra)? Or 3 weeks (Rails)? Also, the assessments with Learn instructors have been immensely helpful, but I get a bit nervous. So I tend to schedule my  assessments a ways out and over-prepare with my review of the material.

If you read my Rails assessment post, you might remember that my next steps were to extend the functionality of my Rails project with some jQuery magic. Hrm. Okay, not gonna lie, it took me a while to figure out what they were asking for, as each of the requirements didn’t necessarily ask for an additional feature, it seems like they were mostly describing specific design choices in order to implement the first couple of features.

Here are the Specific Project Requirements and my choices:

1. Must render one show page and one index page via jQuery and an Active Model Serialization JSON Backend. 

I had multiple models to choose from (Attractions, Destinations, Users, Trips), but since vacation planning was the whole point of my app, trips seemed like the obvious choice to work on. I wanted to be able to reveal a little bit more information about a trip on the index page, and on the trip show page I wanted to be able to cycle between all trips with a next button, for inspiration.

  • *Trips Index page has a “More info” link that expands a section under the trip to show the trip’s city, start date and end date.
  • *Trips Show page has a “next” link which updates the page by showing the next trip.

2. Must use your Rails API to create a resource and render the response without a page refresh 

This confused me for a long time until I went back through the end of the curriculum. Then I realized that it probably meant I was supposed to use AJAX post to create a new object. I chose to create a new attraction.

  • *Via the Attractions page, you can create a new attraction (and associated destination and trip, which was a feature of my old app as well), and it will show it to you on the same page by exposing the new data in a hidden div, with no refresh.

3. The Rails API must reveal at least one has-many relationship in the JSON that is then rendered to the page.

  • *Index page – a User has many Trips.
  • *Show page – a Trip has many Attractions.

4. Must have at least one link that loads, or updates a resource without reloading the page.

  • *Index page – has “More info” link that loads … more info
  • *Show page – “Next trip” link 

5. Must translate the JSON responses into Javascript Model Objects. The Model Objects must have at least one method on the prototype. Formatters work really well for this.

This part confused me as well.  I guess they were asking for the JSON responses to be turned into JavaScript objects first before the updated data was rendered to the page. So for example I’d hit the page for trip information (in JSON), and then take the info I needed to create a JavaScript Trip object. Then I’d take that object and use it in the rendering of the information. Also, I’d have to add a method to the prototype. Easy enough.

  • *Trip has the countdown() method
  • *Attraction has the formatUrl() method

Anyways! Here’s a walkthrough of my updated project.  

Read more

REST is BEST

REST? Wut?

This is embarrassing to admit, but a year or so ago, I didn’t really know what REST was. I remember that I was poking around the Twitter developer documentation, trying to figure out how to get a certain location’s Twitter trends. Based on keywords alone, GET trends/place looked like it was what I needed, and it was what I eventually used, but at the time I didn’t truly understand how to work with API endpoints. I was just bumbling along, trying to get my one little piece of data. I didn’t see the patterns.

Anyways, embarrassing. I can laugh about it now because REST is awesome!

So… what is REST? REST stands for REpresentational State Transfer. It’s an architectural style for how systems can communicate with one another. One key differentiator of REST is that it’s “resource based” instead of action based. What’s a resource? It’s generally anything that you want to provide access to in your web app/service. That’s a pretty broad idea, but it’s easiest to think in terms of nouns. Here are some examples of resources from my recent Rails project, which was a vacation tracker: there’s a “trip” resource, “user” resource, “destination” resource, and an “attraction” resource.

What is RESTful routing?

So far in my learning, REST has come up most often in routing my web apps. Apparently, back in the wild west days of the Internet, there were no conventions in place for handling URLs. A URL for creating a new blog post could be “www.bloggy.com/draft-new-post” on one site, and “www.wonderblog.com/new-blogpost” on another site.

RESTful routing uses a combination of HTTP VERB & URI. This design leads to a predictable mapping between the URL resource & the corresponding controller CRUD actions. This consistency makes things better for everyone, users and developers alike.

Continuing with my project example, this means that I can get and send information about each of these “resources” by using specific combinations of VERBS & URLS. This is nice because you can reuse the same URL for multiple needs. RESTful design makes for cleaner, shorter, and more predictable URLs. Rails is all about conventions, so it’s no surprise that Rails makes it easy to implement a RESTful design pattern.

There’s seven possible RESTful route options available, to correspond to seven controller actions.

As a refresher, the  CONTROLLER ACTIONS include:::

  1. Index – shows an index page for the resource
  2. Create – creates a new resource
  3. New – renders the page/form for creating the new resource
  4. Edit – edits an existing resource
  5. Show – shows a specific/individual resource
  6. Update – updates an existing resource
  7. Destroy – deletes the resource


And the HTTP VERBS used include:::

  1. GET – this method retrieves data
  2. POST – sends data (via forms for example)
  3. PATCH/PUT – updates existing data
  4. DELETE – deletes the record


And here’s what the seven RESTful routes looks like in my Rails app for the Trip resource:

HTTP Verb / URL path / Controller action

  1. GET            /trips                   # Index – Show all trips
  2. POST          /trips                  # Create – Create a new trip
  3. GET            /trips/new          # New – Renders the form for creating a new trip
  4. GET            /trips/:id/edit      # Edit – Renders the form for editing an existing trip
  5. GET            /trips/:id              # Show – Show a single trip
  6. PATCH       /trips/:id              # Update – Update a trip
  7. DELETE     /trips/:id              # Destroy – Delete a trip

When I was first learning about the routing conventions it was a bit overwhelming, but you basically just have to see examples of this over and over again to get it. When you finally do, you’ll love REST too.

Here are a few more helpful and in-depth resources:

Scroll To Top